What Changes From the Line Follower
This project reuses the chassis, Arduino, L298N driver, and battery from the line following robot guide. The two IR sensors come off; an HC-SR04 ultrasonic sensor on a servo goes on.
The Bot Scout obstacle-avoider test asks whether the robot can find a way through, not just stop before hitting something. A robot that only reverses is not solving the problem; it is deferring it.
Total added cost is under $10: an HC-SR04 module ($3-5), an SG90 servo ($3-6), and a sensor bracket or a piece of foam-core.
| Part | Purpose | Approx. price (USD) |
|---|---|---|
| HC-SR04 ultrasonic sensor | Distance reading (2-400 cm) | $3-5 |
| SG90 micro servo | Sweeps the ultrasonic head left/right | $3-6 |
| Sensor mount / bracket | Holds HC-SR04 on the servo horn | $2-5 |
| Jumper wires (extra) | Servo control + ultrasonic trigger/echo | $2-4 |
Wiring
HC-SR04: VCC to 5V, GND to GND, TRIG to Arduino digital pin 11, ECHO to Arduino digital pin 12.
SG90 servo: red to 5V, brown to GND, orange (signal) to Arduino digital pin 9. If the servo jitters, add a 100 µF capacitor across the servo power leads.
Motor driver wiring stays the same as the line-follower. Battery pack stays the same. Free digital pins 2 and 3 by removing the IR sensors.
Decision Logic
The simplest scan loop reads distance straight ahead. If less than 20 cm, stop. Sweep the servo to +80°, read distance. Sweep to -80°, read distance. Turn toward the side with more clearance.
That gives a robot that navigates a living room without hitting furniture. For anything more, add a small memory of the last three decisions to avoid oscillating between two dead ends.
- distance = readUltrasonic();
- if (distance > 20) forward();
- else { stop(); left = scanLeft(); right = scanRight(); if (left > right) turnLeft(); else turnRight(); }
Common Failures and Fixes
Ultrasonic reads 0 or garbage: TRIG/ECHO swapped. Or the sensor is pointed at a soft surface (fabric, foam) that absorbs the pulse.
Servo jitters: shared power with the motors is browning out. Add a decoupling cap, or run the servo from a separate 5V regulator.
Robot stops but never turns: the scan reads two similar distances and the tie-breaker never runs. Add a small offset (turn left if difference < 5 cm).
For a next-project ladder, add wheel encoders and dead reckoning, or move to a Pi-based platform for camera vision. See the Raspberry Pi robot kits guide for camera-based upgrades.
What This Project Teaches
Ultrasonic ranging is a real sensor with real physics: it fails on soft surfaces, angled surfaces, and surfaces further than about 4 m. Learning where it fails is more valuable than getting the demo working.
Servo-mounted scanning is the cheapest way to give a robot a wide field of view. The pattern (scan, decide, move) is the same one used in far more expensive systems.
For a sourcing recap, see the where-to-buy-robot-parts guide. The parts for this project are stocked by Adafruit, SparkFun, and Pololu.
Where To Buy
The models below are the ones we point readers at, listed in the order we would consider them. We earn a commission if you buy through these links, at no extra cost to you — it never changes which robots make the list.
ELEGOO Smart Robot Car Kit
Best first robot buildThe default first robot: chassis, motors, ultrasonic sensor, and line-following sensors with code you can actually read and change. Line following and obstacle avoidance work out of the box.
Check price on AmazonAffiliate link. Price and stock change constantly, so we show them only on Amazon.
- Uno-based chassis with motors
- Ultrasonic and line-tracking sensors
- Bluetooth and IR control
- Everything needed for the classic beginner projects
- Code is open and easy to modify
- Assembly takes a few hours
- Plastic chassis is not rugged
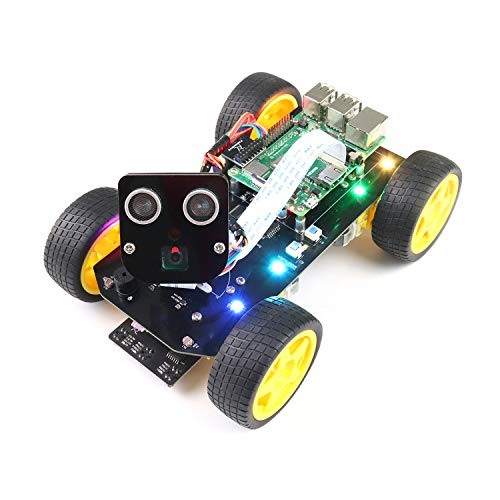
Freenove 4WD Car Kit
Best Raspberry Pi robot kitA Pi-based rover with a camera on a servo mount, so it is a vision project from day one rather than a line-follower you later try to upgrade.
Check price on AmazonAffiliate link. Price and stock change constantly, so we show them only on Amazon.
- Raspberry Pi based (Pi not included)
- Camera on pan-tilt servos
- Python tutorials included
- Camera and vision from the start
- Well-documented Python codebase
- Raspberry Pi sold separately
- Assembly is involved
Bottom Line
An Arduino obstacle avoiding robot swaps line sensors for an ultrasonic on a servo. Same chassis, ten new lines of code, and a real lesson in where a $3 sensor fails.
Reuse the line-follower chassis, add the HC-SR04 and SG90 servo, and iterate on the scan-decide-move loop until the robot navigates a full room.
FAQs
How does an ultrasonic sensor work on a robot?
The HC-SR04 fires a 40 kHz pulse from one transducer and times how long the echo takes to return to the other. The time-of-flight times half the speed of sound gives the distance to the nearest object between roughly 2 and 400 cm.
Why does my obstacle avoiding robot's servo jitter?
Servos and motors on the same power rail brown each other out. Add a 100 µF decoupling capacitor across the servo power leads, or run the servo from a separate 5V regulator with a shared ground.
Can an obstacle avoiding robot use a Raspberry Pi?
Yes. The same HC-SR04 and SG90 servo wire into a Pi's GPIO pins. The code is Python instead of C++, and boot time is longer, but the logic is identical.
What is the difference between an obstacle avoiding robot and a self-driving car?
Scale and sensor fusion. An obstacle avoiding robot uses one distance sensor and a stateless decision. A self-driving car fuses camera, radar, and lidar with a mapped environment and a planning stack. The logical pattern (scan, decide, move) is the same; the reliability requirements are not.
Primary Sources
Still deciding? Our top pick above, the ELEGOO Smart Robot Car Kit, is the one we'd point you at.