Error Codes and Voice Alerts on the Robot
A stopped Roomba identifies its own failure before you take anything apart. On 500 to 900, e, i, j, s, 100/1000, 200/2000, Plus 400/500, Max 700, and m series models, a red light ring illuminates and a voice narrates the specific issue. If you missed the announcement, press the power or CLEAN button to hear Roomba repeat the exact message. Wi-Fi connected models also push the alert directly to the iRobot HOME app.
Older models like the Roomba 800 series play a two-tone alert chime before speaking the error number. Modern units announce numbers corresponding to sensors, brush rollers, or bumper switches. You can find the model number printed on the underside of the robot near the left wheel to match the right series guide. Never guess the fault based on where the robot stopped in the room. The spoken number isolates the root cause directly.
Clearing an operational stoppage requires checking whether the issue involves physical debris or a sensor obstruction. Extractors, side wheels, and bumper panels trigger distinct warnings that shut down the cleaning cycle to protect internal motors. When the battery charge drops too low to run navigation routines, Roomba shuts down its cleaning head and issues an audio reminder to recharge on the dock.
Roomba Charging Error Codes and Electrical Contacts
Charging requires the battery, robot chassis, and dock contacts to function together without interruption. The iRobot charging error chart groups charging faults into battery detection, circuit current, temperature limits, and communication failures. On a charging fault, Roomba halts power transfer. It flashes its indicator and reports a Charging Error (CE) code.
Codes CE1 and CE101 indicate the robot cannot detect an installed battery, requiring you to remove and reinstall the pack. Codes CE4, CE5, CE104, CE105, CE21, and CE121 mean the dock or robot contacts cannot establish proper electrical current. You can resolve these contact codes by unplugging the dock and wiping the metal charging pads clean with a dry cloth. Temperature faults like CE6, CE7, CE106, and CE107 occur when a battery is too hot or cold, which requires letting the unit reach room temperature before retrying.
Communication and authenticity warnings like CE2, CE8, CE17, CE102, and CE117 flag unverified battery electronics or short-circuit risks. iRobot documentation states that aftermarket batteries may cause charging errors. They also void the warranty. For severe battery degradation codes like CE9, CE11, CE109, CE111, CE114, or repeated CE20 failures, explore Roomba battery replacement options using authentic packs, which iRobot lists from $99.99 to $169.99 at the time of writing.
| Charging error | What iRobot says it means | Fix |
|---|---|---|
| CE1 / CE101 | Battery not detected | Remove and reinstall the battery |
| CE2 / CE102 | Over-current charge fault | Confirm authentic iRobot Li-ion battery and inspect for liquid damage |
| CE4, CE5 / CE104, CE105 | No or low current from dock or robot | Clean charging contacts on dock and robot base |
| CE6, CE7 / CE106, CE107 | Battery too warm or too cold | Bring robot to room temperature and retry charging |
| CE8 / CE17 / CE117 | Cannot communicate with battery or unverified authenticity | Ensure authentic pack, remove and reinstall battery |
| CE9, CE11 / CE109, CE111, CE114 | Battery failure or internal cell failure detected | Replace with genuine iRobot battery |
| CE19 / CE119 | Charge timed out | Remove and reinstall battery, clean contacts |
| CE20 / CE120 | Battery fault or not ready | Remove battery for 15 minutes, reinstall; replace if persistent |
| CE21 / CE121 | Docked but unable to charge | Clean contacts on both robot and base |
Startup Failures When Roomba Will Not Turn On
An unresponsive Roomba usually means an open circuit, a dead battery, or dirty dock terminals. If the robot will not light up or respond to button presses, work through physical hardware checks in a strict sequence. Do not attempt unverified button combinations or unofficial reset rituals.
Unresponsive units often sit on depleted cells because the charging pads failed to make solid metal contact. Restoring power requires checking the dock power light, clearing oxidation on the charging contacts, and reseating the internal battery pack. Follow the listed recovery steps in order before assuming internal component failure.
- Check the dock's power light to ensure the charging base receives wall outlet power.
- Clean the metal charging contacts on both the underside of the robot and the dock base using a dry cloth.
- Power off the robot, remove the bottom cover screws, and remove and reinstall the battery to seat the connector tabs.
- Perform the 15-minute battery rest procedure from the CE20 protocol by leaving the pack unseated before reinstalling.
- Place the robot directly onto the charging pins manually and allow the battery to charge if deeply discharged.
- Review battery health indicators and obtain a genuine replacement pack if the robot stays unpowered.
Movement Errors and Jammed Roller Brushes
Mechanical drive faults occur when hair, carpet threads, or debris wrap around moving axles. Error numbers differ between generations; the two iRobot charts linked below cover the 800 series and the current 100 through Max 700 lines. On older units documented in the Roomba 800 series error messages chart, Error 1 indicates a wheel hanging down, Error 2 means extractors cannot turn, Error 5 or 7 indicates a jammed side wheel, and Error 9 points to a compressed bumper. Error 6 flags dirty cliff sensors or operation over dark surfaces that absorb infrared signals.
On newer platforms outlined in the iRobot general error message chart, code numbers follow an updated mapping. Error 2 indicates a main brush stall, Error 4 indicates a left wheel jam, and Error 5 indicates a right wheel jam. Error 6 indicates cliff sensor issues, Error 9 signals a stuck bumper, and Error 14 indicates a missing dust bin. Motor and navigation stalls report as Error 26 for vacuum motor airflow restrictions, Error 33 when the robot is trapped, and Error 48 when a physical path is blocked.
Advanced vision and mopping models report additional hardware states. Error 68 flags camera failure on Plus 500 models, while Error 69 indicates a localization error requiring adequate room lighting. Modern units report Error 1000 or 1001 for side brush stalls and Error 1025 for light detection and ranging (LiDAR) laser sensor abnormalities. Regular maintenance steps from our robot vacuum maintenance overview keep these drive assemblies turning freely.
Clean Base and Dock Communication Faults
Self-emptying Clean Base stations and mopping docks report their own diagnostic codes when evacuation or refilling fails. Dock errors 350 and 353 announce that the evacuation bag is missing or completely full. Error 365 signals that evacuation runs too frequently, instructing owners to check the dock and the robot bin for clogs.
Communication errors prevent the robot and dock from aligning properly during returns. Error 360 indicates a communication failure with an AutoWash dock, while Error 520 points to an Infrared Data Association (IrDA) communication failure that requires cleaning the infrared (IR) sensors. Errors 660 and 757 denote direct robot-to-dock communication loss. If docking fails consistently across cycles, inspect line-of-sight sensors and consult robot vacuum troubleshooting techniques.
Combo mopping docks introduce fluid management diagnostic codes. Errors 450 and 451 signal that the dock water tank is missing or running low, while Error 455 indicates internal pump failure. Docks with wastewater reclamation report Error 653 when the grey water tank is missing, Error 654 when the dirty water tank is full, and Error 513 for grey water pump issues. Basin overflow codes 517 and 672, pad actuator stalls 669 and 752, and missing fresh water tank warnings 671 require reseating mechanical dock trays.
Mapping Failures and App Setup Conflicts
Navigation problems often stem from outdated floor plans or missing cloud credentials rather than physical hardware breakdowns. Error 32 signals a map version mismatch between the onboard memory and the mobile application. In newer series, Error 1029 indicates an incompatible map, which iRobot resolves by deleting the current map in the app and running a fresh mapping run. When physical room layouts change dramatically, remap routines clear stale navigational paths.
Roomba units equipped with optical sensors require specific operational environments. Error 69 announces that localization failed due to inadequate ambient light, which you can fix by turning on room lights during cleaning schedules. In mopping units, Error 1026 marks a stuck mopping pad, while Error 1030 indicates the robot is stuck within a designated No Mop Zone.
Software and account validation also throw dedicated operational codes. Error 29 warns that a software update was interrupted or that the robot attempted to start while downloading firmware. Error 266 indicates a subscription or account setup requirement where the robot must be registered and configured inside the mobile app. The iRobot limited warranty excludes ISP interruptions and weak Wi-Fi signals.
Service Boundaries and the iRobot Limited Warranty
Some error states cannot be repaired at home. Error 47 indicates an invalid calibration state requiring a remote sensor update or direct assistance from iRobot technical support. Similarly, internal battery failures like CE114, CE3 or CE103 that persists after retrying, and any liquid damage, need iRobot service. For complex physical repairs, review Roomba repair. Authorized centers are listed under robot repair services.
The iRobot limited warranty covers defects in materials and workmanship for one year from the date of purchase or delivery. To file a claim, you must provide the robot serial number and original proof of purchase from an authorized dealer. The iRobot remedy includes repair, exchange with a functionally equivalent unit manufactured from new or serviceable parts, or an upgraded model at their option.
Warranty protection excludes normal wear and tear, including battery capacity loss over time. Claims will be rejected for liquid or water damage, short-circuited batteries, broken battery seals, and failure caused by non-genuine replacement parts or cleaning solutions. Transporting the robot in inadequate packaging or using units with defaced serial numbers also invalidates coverage.
Where To Buy
The models below are the ones we point readers at, listed in the order we would consider them. We earn a commission if you buy through these links, at no extra cost to you — it never changes which robots make the list.

iRobot Roomba j7+
Best for pet homesRoomba's obstacle-avoidance model, built around not driving through pet accidents. Self-empty base, and the widest availability of parts and service in the US.
Check price on AmazonAffiliate link. Price and stock change constantly, so we show them only on Amazon.
- Front camera obstacle avoidance
- Dual rubber brushes
- Clean Base self-empty dock
- Best-supported brand for repairs and parts
- Genuinely good at avoiding pet messes
- Camera navigation maps slower than LiDAR
- Mopping needs a separate unit
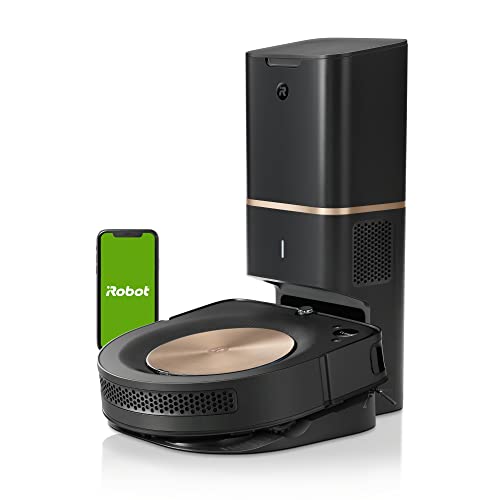
iRobot Roomba s9+
Deep diveThe D-shaped, highest-suction Roomba of the classic era. Outside the current j-series lineup, but still sold by third-party retailers at a steep discount and the strongest corner-cleaner iRobot has shipped.
Check price on AmazonAffiliate link. Price and stock change constantly, so we show them only on Amazon.
- D-shaped body for corner reach
- 40x suction vs the 600 series
- Clean Base auto-empty
- Best corner and edge coverage of any Roomba
- Deep discounts now that it is off the current lineup
- Superseded by the j-series
- No obstacle-avoidance guarantee
Bottom Line
Most Roomba errors resolve by cleaning sensor lenses, clearing hair from roller bearings, or scrubbing charging contacts with a dry cloth. Owners should not disassemble sealed drive gearboxes or purchase third-party replacement circuit boards without checking warranty status. If an Error 47 appears, repeated CE114 battery failures persist, or internal liquid intrusion occurs, stop cycling the robot and open an official claim with iRobot support.
Review our complete breakdown of coverage terms and exclusions in the Roomba warranty guide before opening your claim.
FAQs
Why is my Roomba not charging?
Charging failures usually stem from dirty metal contact pads, an unseated battery, or an unpowered dock. Unplug the dock and wipe the contacts on both the dock and robot base with a dry cloth. Inspect the dock power light, remove and reinstall the battery pack, and check the red ring alert for specific codes like CE4 or CE21.
What does Roomba charging error 8 mean?
Charging Error 8 indicates the robot cannot establish proper communication with the installed battery. iRobot instructions direct you to verify that the battery is an authentic iRobot lithium-ion pack, remove the bottom cover screws, and reinstall the battery to ensure the terminal pins seat firmly.
How do I reset my Roomba?
Official iRobot troubleshooting documentation resolves hardware faults through physical power cycling rather than arbitrary button presses. For battery-related faults like CE20, remove the battery for 15 minutes and reinstall it. For persistent map synchronization errors like Error 1029, delete the floor plan inside the iRobot app and run a complete remapping cycle.
Why won't my Roomba return to the dock?
Error 18 indicates the robot cannot navigate back to its Home Base. iRobot's 800 series chart says to check the Home Base and clean the charging contacts on both the robot and the dock.
What does Error 14 mean on a Roomba?
Error 14 indicates that the robot does not detect an installed dust bin. On Roomba 800 and newer models, remove the dust bin, reinstall the bin and check the bin contacts, which is the fix iRobot lists.
Can I use a third-party battery in a Roomba?
iRobot advises against aftermarket batteries and states that non-genuine packs cause charging errors such as CE2, CE8, or CE17. Using third-party batteries or components not provided by iRobot voids the one-year limited warranty and may cause charging circuit safety shutdowns.
Primary Sources
Still deciding? Our top pick above, the iRobot Roomba j7+, is the one we'd point you at.