Diagnostic Checks for Dock and Battery Charging Errors
A charging alert on your robot vacuum does not automatically prove the battery has reached the end of its functional life. Charging requires the battery pack, the robot internal circuitry, and the Home Base dock to establish an uninterrupted electrical circuit. According to the iRobot charging error chart, many common charging alerts stem from tarnished contact points or ambient room temperature rather than permanent cell degradation.
On Roomba series 500 through 900, e, i, j, s, 100/1000, 200/2000, Plus 400/500, Max 700, and Braava m series, the robot signals an issue through a red light ring paired with a narrated voice announcement. Before purchasing hardware, listen to the specific code. Alerts such as Charging Error 4 (CE4), CE5, CE104, and CE105 indicate low current or no current flowing between the dock and robot. Similarly, CE21 and CE121 report that the unit is docked but unable to draw charge. In these instances, cleaning the base and robot contacts with a clean cloth often resolves the issue entirely.
Environmental conditions also interrupt power cycles without damaging internal components. Charging Error 6 (CE6), CE7, CE106, and CE107 indicate that the battery pack is either too warm or too cold to safely accept current. The proper remedy is moving the vacuum to a moderate room-temperature space and allowing the pack to stabilize before testing the dock again. True hardware failures are typically flagged by specific codes: CE9, CE109, CE11, and CE111 report an internal battery failure where the pack may need replacement, while CE114 signals a permanent internal fault requiring a fresh pack.
Selection Guide for Genuine Replacement Battery Packs
Start by finding your vacuum's exact model number. It is printed on the underside of the robot near the left wheel. Matching this designation against official iRobot replacement parts prevents purchasing an incompatible pack that fails to seat or triggers communication faults.
At The Bot Scout, we find that owners frequently confuse similar series designations, especially across newer connected platforms. For instance, the McKinley battery powers standard Roomba e, i, and j series units, but iRobot explicitly excludes the Roomba i8, Roomba Combo models, and the j9+ or 10 Max from this pack.
The table below covers the four current genuine iRobot retail batteries. Before ordering, verify your robot configuration, especially if you own a Combo hybrid model or an older legacy unit from the 500 through 800 generations.
| iRobot battery | Fits | Price at time of writing | Notes |
|---|---|---|---|
| McKinley Battery for e/i/j robots | Roomba e, i, and j Series (excluding i8) | $99.99 | Item 4854069. Lithium Ion. Not compatible with Combo models or j9+/10 Max. Listed out of stock at time of writing. |
| Roomba 1800 Lithium Ion Battery | Roomba 960; 600/800 series: 614, 615, 640, 652, 665, 670, 671, 675, 677, 680, 685, 690, 695, 801, 805, 850, 860, 877, 890, 891, 895 | $109.99 | Item 4502233. Lithium Ion. Listed as currently unavailable at time of writing. |
| iRobot XLife Extended Life Battery | Create 2, Scooba 450, Roomba 500 & 700 Series, 870, 880, and select 600 Series (618, 620, 630, 635, 645, 650, 655, 660) | $99.99 | Item 4636434. In stock at time of writing. Manufacturer states it delivers twice as many cleaning cycles as the Advanced Power System battery. |
| Lithium Ion Battery for Roomba Combo j9+ & j7+ robots and select Roomba j9+ robots | Roomba Combo j9+, Roomba Combo j7+, and Roomba j9+ purchased before July 15, 2024 | $169.99 | Item 4785636. Lithium Ion. Listed as not available at time of writing. |
Evaluating Original Equipment Against Aftermarket Replacements
Online marketplaces offer numerous third-party replacement packs claiming compatibility with various Roomba generations. While these non-certified options often sell at lower price points than official retail packs, owners must weigh these savings against clear operational risks outlined by iRobot. Official documentation from iRobot explicitly states that installing aftermarket batteries can trigger specific communication and charging faults, including error codes CE2, CE8, CE17, CE102, and CE117.
The vacuum's charging logic constantly interrogates the battery pack's management circuitry. When communication fails or current flow registers out of specification, the vacuum shuts down the charging cycle to protect its internal electronics. Nuisance errors stall cleaning schedules. Worse, iRobot policies note that non-genuine batteries void your product warranty.
Under the iRobot limited warranty, iRobot covers defects in materials and workmanship for one year from the purchase date or verified delivery date. However, this coverage explicitly excludes normal wear and tear, including the natural depletion of battery capacity over regular cleaning cycles. If your battery fails within that initial year due to a manufacturing defect, an authorized claim provides a replacement, but routine aging remains the financial responsibility of the owner.
Standard Steps for Replacing the Internal Battery
Replacing a depleted battery pack is straightforward. Owners can do it at home without specialized skills. Caution: before opening the chassis or touching any electrical components, always power off the robot completely and disconnect the charging dock from mains power to avoid electrical hazards.
Begin by placing a soft towel or mat on a flat surface to prevent scratching the faceplate, then flip the vacuum upside down. Using an appropriate screwdriver, loosen the fasteners holding the bottom base cover or the dedicated battery access door in place. Set the panel aside to expose the internal battery compartment.
Take note of the battery orientation and contact alignment before extracting the old unit. Lift the depleted pack out of the bay, inspect the terminal cavity for loose dust or debris, and gently clean the area with a dry cloth. Insert the replacement battery firmly into the bay, ensuring the contacts seat squarely against the robot terminals. Reinstall the bottom cover, secure the retaining screws without over-tightening, and place the robot directly onto its powered charging dock. Always leave the robot docked undisturbed until the status indicator confirms a full charge before starting a new cleaning job.
- Power off the robot completely and unplug the charging dock from wall power before beginning work.
- Place the robot upside down on a clean, soft surface to protect the top casing and sensors.
- Loosen the battery door retaining screws and remove the access cover.
- Note the physical orientation and terminal alignment of the existing battery before lifting it out.
- Clean any accumulated dust from the battery bay using a dry microfiber cloth.
- Insert the fresh battery pack firmly to ensure solid mechanical contact with the internal terminals.
- Reinstall the cover, tighten the screws securely, and charge the robot fully on the dock before running a cycle.
Resolving Charge Timeouts with the Fifteen-Minute Rest Procedure
Occasionally, a newly installed battery or a heavily depleted pack throws a charging fault during its initial recovery cycle. Charging Error 19 (CE19) and CE119 indicate a charge timeout. iRobot's fix for CE19 and CE119 is to remove and reinstall the battery and clean the charging contacts.
For Charging Error 20 (CE20) and CE120, iRobot outlines a specific recovery procedure designed to reset the internal battery monitoring system. First, power off the unit and remove the battery pack from the robot chassis entirely. Allow the battery pack to rest outside of the robot for a full 15 minutes.
While waiting, wipe down the metal charging contacts on both the underside of the robot and the base of the dock to eliminate electrical resistance. After the 15-minute rest period has elapsed, reinstall the battery firmly into the compartment, reattach the bottom cover, and seat the robot back onto the Home Base. If CE20 or CE120 persists immediately after completing this procedure, iRobot documentation confirms that the battery pack has suffered an unrecoverable fault and must be replaced.
Replacement Costs and Component Availability Across Model Lines
Budgeting for a battery replacement depends directly on the Roomba series you own. Across the genuine iRobot product catalog, replacement battery pricing spans a spread from $99.99 to $169.99 at the time of writing. Legacy platforms and standard dry-vacuum models sit at the lower end of the scale, while hybrid mopping platforms command higher component prices.
Specifically, the McKinley battery for e, i, and j robots retails for $99.99, matching the price of the legacy iRobot XLife Extended Life battery at $99.99. Owners of series 960 and compatible 600 or 800 vacuums pay slightly more, with the Roomba 1800 Lithium Ion battery listed at $109.99. At the top of the spectrum, the specialized Lithium Ion battery for Roomba Combo j9+ and j7+ costs $169.99.
Component availability is an equally important practical factor. At the time of writing, the official iRobot store showed the McKinley battery, Roomba 1800 battery, and Combo j9+/j7+ battery listed as out of stock or currently unavailable, with only the XLife Extended Life battery in stock. When genuine packs are backordered at the iRobot store, owners should buy only from iRobot or an iRobot authorized seller, since the warranty page excludes parts bought elsewhere rather than resorting to non-certified substitutes that could introduce charging faults or compromise coverage.
Mechanical Issues Unrelated to Battery Cell Degradation
A robot that returns to its dock prematurely does not always suffer from degraded battery chemistry. Hair wrapped around the brush roller bearings or debris packed behind the front caster wheel increases electrical load during operation.
Before concluding that your battery requires replacement, perform a thorough mechanical inspection of the robot undercarriage. Clean the brushes and the front caster wheel and check that both turn freely. If runtime remains abnormally short despite pristine drive components and a verified charging circuit, explore our guide to Roomba troubleshooting for deeper diagnostic workflows.
Should your vacuum fail to power on entirely, display continuous error lights, or exhibit strange drive behavior after a fresh battery installation, the issue likely points to an internal board failure or motor defect. When standard maintenance routines fail to restore operation, consult our comprehensive guide to Roomba repair to evaluate replacement modules, motor assemblies, and service options.
Where To Buy
The models below are the ones we point readers at, listed in the order we would consider them. We earn a commission if you buy through these links, at no extra cost to you — it never changes which robots make the list.

iRobot Roomba j7+
Best for pet homesRoomba's obstacle-avoidance model, built around not driving through pet accidents. Self-empty base, and the widest availability of parts and service in the US.
Check price on AmazonAffiliate link. Price and stock change constantly, so we show them only on Amazon.
- Front camera obstacle avoidance
- Dual rubber brushes
- Clean Base self-empty dock
- Best-supported brand for repairs and parts
- Genuinely good at avoiding pet messes
- Camera navigation maps slower than LiDAR
- Mopping needs a separate unit
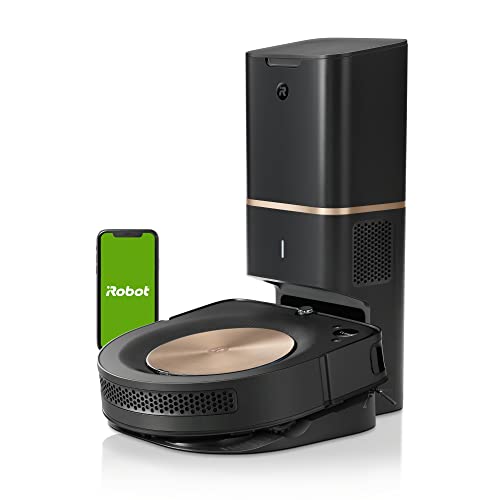
iRobot Roomba s9+
Deep diveThe D-shaped, highest-suction Roomba of the classic era. Outside the current j-series lineup, but still sold by third-party retailers at a steep discount and the strongest corner-cleaner iRobot has shipped.
Check price on AmazonAffiliate link. Price and stock change constantly, so we show them only on Amazon.
- D-shaped body for corner reach
- 40x suction vs the 600 series
- Clean Base auto-empty
- Best corner and edge coverage of any Roomba
- Deep discounts now that it is off the current lineup
- Superseded by the j-series
- No obstacle-avoidance guarantee
Bottom Line
Replacing a Roomba battery restores cleaning performance when internal cells fail or runtimes decay, provided you select the exact pack engineered for your chassis. If your robot displays contact-related alerts like CE4 or CE21, or if bound debris is overloading your brush drive motors, purchasing a new pack will not solve the underlying issue. Confirm error codes on the official charging chart, clean all electrical contacts, and verify your model designation near the left wheel before buying replacement hardware.
Check our complete Roomba troubleshooting guide to diagnose sensor alerts, wheel stalls, and dock connection faults before replacing parts.
FAQs
How much does a Roomba battery replacement cost?
Genuine iRobot replacement batteries range from $99.99 to $169.99 at the time of writing. The McKinley pack for e, i, and j models and the legacy XLife battery retail for $99.99, the 1800 Lithium Ion pack costs $109.99, and the dedicated Combo j7+ and j9+ pack sells for $169.99.
Which battery does my Roomba use?
Your vacuum model number determines compatibility and is printed on the underside of the robot near the left wheel. Match that number against official listings: e, i, and standard j series use the McKinley pack, select 600/800/960 units take the 1800 pack, 500 and 700 series plus the 600/800 models listed on the XLife page use XLife, and Combo models require dedicated packs.
Can I use a non-iRobot battery in my Roomba?
iRobot advises against aftermarket batteries, warning that non-genuine packs may trigger charging errors like CE2, CE8, or CE17 and will void your warranty. While third-party packs exist, authentic units ensure proper communication with the charging dock and safety circuitry.
Does the iRobot warranty cover the battery?
The iRobot one-year limited warranty covers materials and workmanship defects for products bought through authorized sellers, but it explicitly excludes normal wear and tear, including battery capacity depletion over time. A battery that degrades naturally with regular use must be purchased by the owner.
How do I know my Roomba battery needs replacing?
Look for specific charging errors such as CE9, CE109, CE11, CE111, or CE114, which indicate detected battery failures. If cleaning runs become extremely brief despite clean brushes and free-spinning wheels, or if Charging Error 20 persists after a 15-minute rest, the pack likely requires replacement.
How long does a new Roomba battery take to charge?
iRobot does not publish a fixed charging duration across all models on its primary store listings. Charge times vary depending on the battery capacity, chemistry, and depth of discharge. Leave the vacuum docked undisturbed until the light ring or LED status indicator signals that charging is complete.
Primary Sources
Still deciding? Our top pick above, the iRobot Roomba j7+, is the one we'd point you at.