Charging Station LED Diagnostic Codes
Robot lawn mower troubleshooting begins at the charging station indicator lamp before touching the machine itself. On Husqvarna Automower installations, the charging station LED displays specific colors and flash patterns that communicate loop integrity, power availability, and system operating modes.
A flashing blue lamp signals that the charging station cannot establish a complete circuit because of a broken wire or a faulty terminal connection. A solid green light confirms that the charging station is transmitting a signal normally, which narrows a persistent no-loop alert to mower-side detection or wire distance limits. Solid blue means the wire is detected but the installation is faulty.
Flashing green indicates ECO mode, where the loop signal shuts down when the mower has no active cutting schedule. Flashing yellow signals a guide-wire fault on Aspire R4 and older units, while a solid red lamp warns of an internal hardware failure inside the power supply or the station circuit board. LED off means no power.
| Station LED | Meaning (Husqvarna) | First check |
|---|---|---|
| Flashing blue | Broken wire or faulty connection | Inspect wire ends at terminals and test loop continuity |
| Solid blue | Wire detected but installation faulty | Check the boundary wire layout and terminal connections |
| Solid green | Normal station transmission signal | Confirm mower is within operating distance of wire |
| Flashing green | ECO mode active | Send mower on an active schedule to wake loop |
| Flashing yellow | Guide-wire issue (Aspire R4 / older) | Check the guide-wire connections |
| Solid red | Station board or power supply failure | Inspect power source or contact a Husqvarna dealer |
| LED off | No electrical power to station | Check mains socket, transformer plug, and wall breaker |
Boundary Wire Resistance and Signal Checks
A broken boundary wire creates an open circuit that prevents the mower from leaving its dock or causes it to halt across the lawn with a no-loop error. Owners should verify that wire ends are fully inserted into the rear terminals of the charging station, with clean contacts that seat firmly in place.
When physical terminal connections appear secure, measure electrical resistance across both boundary wire ends using a multimeter. Husqvarna guidance specifies that owners should expect approximately 0.8 ohm per 100 m of wire. A reading well above this target reveals high-resistance damage or corroded wire, while infinite resistance proves a complete break.
Total boundary wire length must not exceed 800 m across the entire installation. The mower must also stay within 15 m of the boundary wire on an Aspire R4, or within 35 m on other Husqvarna models. Large metal objects such as metal fences, reinforcement steel in concrete, or buried power cables can disrupt loop signals. Following a severe thunderstorm, nearby lightning strikes can damage station electronics, requiring a visit to a Husqvarna dealer.
Finding and Splicing a Wire Break
Locating a hidden break along hundreds of meters of buried line is straightforward using the systematic halving method. Disconnect the suspected boundary line at the charging station, set up a temporary test wire loop to the midpoint, cut the installed wire halfway through the problem section, and attach the test loop to identify which half breaks continuity.
Repeating this midpoint check isolates the fault to a short section. A specialized wire-break detector tool saves considerable physical effort, but official documentation notes that these detectors may not be as effective with partial wire breaks where copper strands still make intermittent contact.
Once you locate the damaged spot, repair the line using a genuine moisture-sealed connector such as the Automower Coupler. Trim 60 centimeters from each damaged end. Insert both ends into the coupler, press it firmly with pliers, and secure the splice back underground or flush to the soil with boundary staples.
- Disconnect the damaged wire section from the charging station terminals before splicing.
- Trim 60 centimeters of wire back from each damaged end to clear corroded strands.
- Insert both clean wire ends fully into the Automower Coupler chambers.
- Press the coupler closed firmly with pliers.
- Bury the finished coupler in the soil or staple it tight against the lawn surface.
Charging Station and Docking Failure Checks
When a robot lawn mower fails to charge or refuses to exit its docking station, owners often assume the onboard battery has reached the end of its working life. The Husqvarna support articles this guide draws on cover loop signals, power supplies, and restarts, not a dedicated charging-failure article.
Begin troubleshooting docking failures by confirming that the station LED is lit and stable. An unlit station or a solid red light indicates that the base cannot supply charging current to the battery contacts. Verify that the power adapter cable is undamaged and that the mains wall outlet delivers steady current.
Check that the mower aligns flush with the charging contacts every time it enters the dock. Mud, dried grass clippings, and oxidation can insulate the charging plates, preventing proper electrical contact. For specific guidance on cleaning or adjusting contact pins on your particular chassis, consult the printed operator manual for your exact model. If docking problems started immediately after an electrical storm, internal board components may have failed, requiring dealer evaluation.
Cutting Blade Replacement and Skid Plate Care
Dull or damaged cutting blades cause frayed, yellowing grass tips, increase motor strain, and drain the battery faster than sharp edges. Husqvarna specifies replacing main-disc blades every 3 to 6 weeks under normal lawn conditions, while secondary EdgeCut disc blades should be replaced every 9 to 12 weeks.
Always install genuine original Husqvarna blades and pack-supplied screws, using fresh screws on every blade swap. Reused screws work loose under field vibrations, creating severe risks for the cutting disc. Never mix different blade types or install new blades alongside worn ones, as uneven blade weight creates rotational imbalance and motor vibration.
Before servicing the cutting assembly, turn the mower power switch completely off and put on heavy protective gloves. Flip the chassis upside down onto a soft surface to avoid scratching the housing, then rotate the skid plate by hand until its access hole aligns with each blade screw. Fasten each new screw firmly, but confirm that the blade still pivots and spins freely around its collar, which Husqvarna describes as a safety feature, not a defect.
- Switch the machine power switch OFF and put on protective work gloves.
- Place the mower upside down on soft grass, carpet, or foam padding.
- Rotate the skid plate until the access hole exposes the blade screw head.
- Unscrew the old blade and discard both the blade and the used screw.
- Fasten a genuine replacement blade using a brand-new screw, verifying the blade spins freely.
- Reset the blade usage timer in the Automower Connect mobile app.
System Restarts and Error Message Clears
When a robot mower stops mid-cycle and displays a notification requiring manual action, clearing the physical obstacle is only the first step. The Automower Connect app and the machine control panel present messages such as cutting system blocked, wheel motor blocked, lifted, or trapped.
Clear away accumulated clippings, fallen branches, or uneven ground depressions that halted the chassis before executing a power restart. Restart procedures vary across Husqvarna model families. On NERA jog-wheel models, rotate the jog wheel to Power off, press down, and then restart the mower by pressing and holding the jog wheel for 3 seconds.
On Aspire R4, R6V, 308V, and 312V models, press the power button for 3 seconds to turn the unit off, followed by a 1-second press to restart. Older keypad models use a rocker switch. Toggle it from O to |. If persistent software errors occur, initiate a factory reset via the Automower Connect app under More, then Settings, then General, and select Reset to factory settings. A reset restores factory defaults while retaining your existing security level, PIN code, loop signal, date, time, language, and country.
- Clear all physical debris, sticks, and terrain ruts around the mower chassis.
- Execute the appropriate power restart method based on your model control system.
- Review detailed error definitions inside Automower Connect under More and Support.
- Perform a factory reset through the mobile application or onboard keypad if errors persist.
- Confirm that stored settings including PIN code and loop signal registration remain intact.
Maintenance Rules Across Other Robotic Brands
While this guide details Husqvarna Automower hardware as the worked example, the underlying troubleshooting principles apply across the entire automated lawncare market. Machines produced by Worx, Mammotion, Segway, and Gardena face the identical operational physics of perimeter loop continuity, charging station current supply, and cutting disc balance.
If you operate an alternative brand or are evaluating hardware options on our best robot lawn mowers 2026 guide, checking station LEDs and terminal resistance remains your quickest diagnostic path. Dull blades and debris around drive shafts stall motors on any residential mower. To compare installation styles across major makers, review our breakdown of robot mower navigation technology before purchasing replacement parts.
Where To Buy
The models below are the ones we point readers at, listed in the order we would consider them. We earn a commission if you buy through these links, at no extra cost to you — it never changes which robots make the list.
Segway Navimow i110N
Best small-yard mowerWire-free mowing for yards up to about a quarter acre. Satellite positioning replaces the buried perimeter wire, which removes the single most painful part of owning a robot mower.
Check price on AmazonAffiliate link. Price and stock change constantly, so we show them only on Amazon.
- No perimeter wire. Satellite positioning
- Rated to roughly 1/4 acre
- App-defined mowing zones
- No wire to bury or repair
- Simple setup for a small, open lawn
- Needs clear sky view to hold position
- Not for heavily treed yards
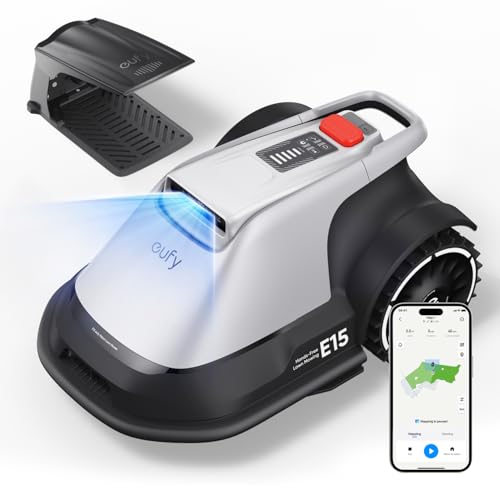
eufy E15
Best camera-navigation mowerNavigates by camera rather than satellite, so tree cover and narrow side yards do not break positioning the way they can on a satellite-only mower.
Check price on AmazonAffiliate link. Price and stock change constantly, so we show them only on Amazon.
- Vision-based navigation
- No perimeter wire
- Auto mapping
- Works under tree cover where satellite mowers struggle
- Wire-free setup
- Newer platform with a shorter track record
- Camera navigation slows in low light
Bottom Line
A disciplined process clears almost all faults without a service center visit. Read the station LED first. Test loop resistance, fit fresh blades on schedule, and restart the mower after clearing the obstacle. Owners should stop disassembly and consult an authorized dealer whenever the charging station displays a solid red light or when electrical failures follow a nearby lightning strike.
Explore our complete robot lawn mower overview to compare models, wire layouts, and maintenance intervals.
FAQs
Why does my Automower say no loop signal?
A no-loop-signal alert occurs when the mower cannot detect the electromagnetic field from the boundary wire. Check the charging station LED. Flashing blue means a wire break or loose terminal. Solid green means the station is transmitting, so the mower is out of range or facing interference.
How do I find a break in the boundary wire?
Use the halving method by disconnecting the suspect boundary line at the charging station, connecting a temporary test wire midway, and checking the station LED to isolate which half contains the break. Repeat until a short section remains. A wire-break detector also works.
How often should I change robot mower blades?
Husqvarna recommends replacing main-disc cutting blades every 3 to 6 weeks under normal mowing conditions. If your machine features an EdgeCut disc, replace those blades every 9 to 12 weeks. Always fit fresh screws. New blades should pivot freely on their collars.
Why won't my robot mower leave the charging station?
Docking stalls happen when the station LED signals a fault, such as an interrupted boundary loop or lost electrical power. Inspect the station light, ensure the mower battery charges properly against clean contact plates, and verify that the operating schedule has not placed the charging station into green-flashing ECO mode.
How do I reset my Husqvarna Automower?
Perform a software reset in the Automower Connect app by navigating to More, Settings, General, and selecting Reset to factory settings. On keypad models, select Settings, General, and Reset all user settings. This procedure clears custom operational options while preserving your PIN code, loop signal registration, and country settings.
What are the most common robot lawn mower problems?
The most frequent robot lawn mower failures stem from boundary wire breaks, dirty charging dock contacts, dull or jammed cutting blades, and terrain obstacles triggering blocked wheel errors. Reading the charging station indicator lamp and testing wire resistance resolves the vast majority of these stoppages.
Primary Sources
Still deciding? Our top pick above, the Segway Navimow i110N, is the one we'd point you at.